No matter what dish you are serving, there is a citrus garnish to compliment it- especially seafood. I constantly keep a small supply of lemons, limes, and oranges around just for the occasion of decoration.
This page will show you several different ways to cut citrus fruit into splendid, functional garnishes.
These garnish tutorials will range from extremely easy to fairly difficult. But don’t get discouraged, with a little practice you can learn anything on this site.
For each of these tutorials, you will need:
- A small, sharp knife- preferably a paring knife
- A cutting board
- Either a lemon, a lime, or an orange
Simple Citrus Twist
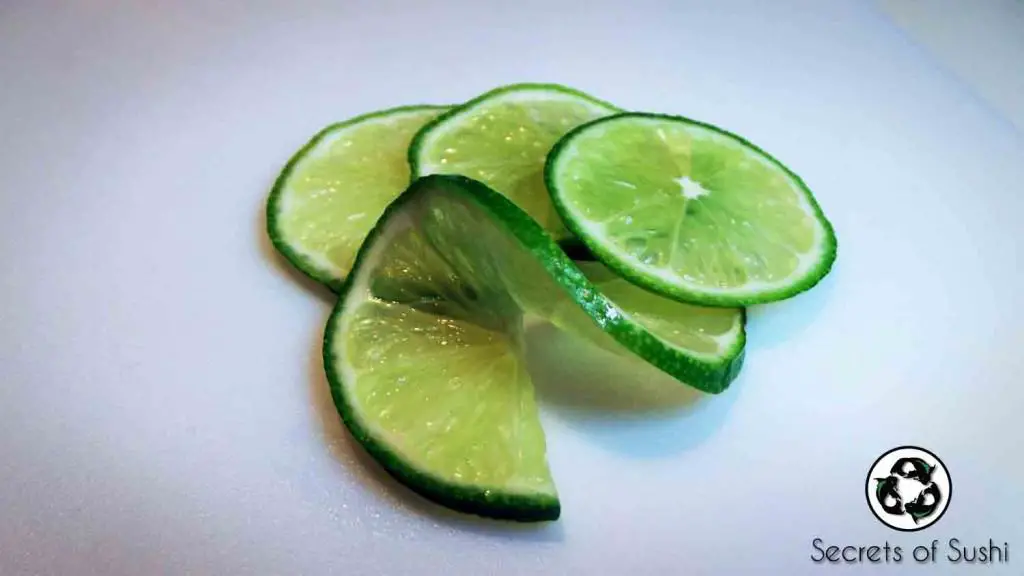
Let’s start off a simple citrus garnish and work our way up. Here are a few slices of lime.
Make sure that your limes are clean and void of any brown spots.
- Cut both ends off of the lime (very thin cuts) and throw them away. Start from one end and cut off a few slices, as thin as you can safely slice.
- **Be sure to check out my Knife Safety tutorial for some quick tips on how to make paper thin slices!
- Then, cut into each slice, just past the center point and twist the lime in opposite directions.
There you go! Easy, right? This type of citrus garnish (lemons or limes) are most commonly used in drinks, but look great on a plate too.
Orange Fan
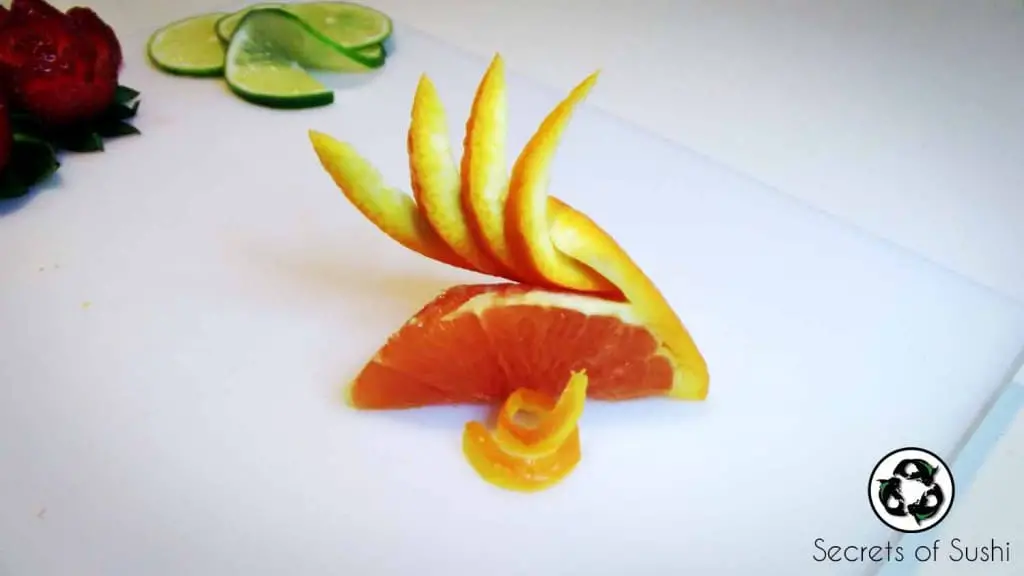
Here is a more complicated citrus garnish. This can be done with all three of the citrus fruits, but we will start off with an orange.
**The only reason why I classify this as difficult is because it requires you to cut, ever so carefully, towards your own fingers. It is a very delicate and dangerous process so please proceed with caution.**
- First, we get a ripe orange and wash it off. Make sure it’s completely dry before we begin.
- Cut the ends of the orange off, about 1 in from each end, leaving the center width of about 1-1.5 in. Saves the ends for later, because you can use them for other garnishes.
- Now cut the orange in half, giving you two half circles. Each half can be made into a fan.
- Take one of the half circles and very carefully cut the peel off 3/4 of the way, leaving about 1/2 in from the end.
- Using your hands, gently work the orange peel until you can straighten it out on the cutting board.
- Lay the orange peel (with the the fruit still attached) at a 45 degree diagonal angle on your cutting board and use your knife to cut 3-4 triangles into the peel. Make sure the cuts start in the center of the peel and go to the edge. Leave just a little bit of room at the opposite edge.
- Now, VERY carefully bend the peel in toward the fruit, fanning out the triangle cuts as you go. Tuck the end of the peel into the point at where the peel and the fruit meet.
- Finally, you can shave off the tip of the peel to ensure that it tucks in better and shave off the rest of the peel attached to the fruit.
**I understand that this description is extremely hard to imagine (I’m not very good at explaining this process on paper). I will eventually record a video tutorial on the orange fan for clarification.
Keep watching this page, as I will be posting more citrus garnish ideas soon!

