The chicken katsu roll is a fantastic example of how you can blend two traditional Japanese dishes into one. This roll is also great for new-comers who may be uncertain about consuming raw fish!
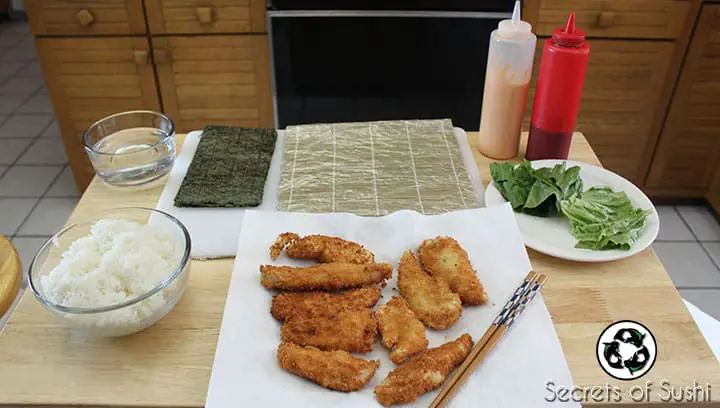
For this tutorial, you will need:
- 1-2 Skinless chicken breasts
- Half sheets of Nori
- 2 cups (240 mL) of Sushi Rice
- Romaine lettuce
- Spicy Mayo
- Eel Sauce
- Panko bread crumbs
- 2 eggs
- Flour
- Cutting board
- Sharp knife
- Bowl of water
- Vegetable oil (for frying)
- Cast iron skillet, wok, or deep fryer
- Plate covered with a few paper towels
- Makisu
- At least 2 bowls
Before you start the Chicken Katsu Roll tutorial, make sure that you have your Eel Sauce, Spicy Mayo, and your Sushi Rice prepared. For instructions on how to make these, click on the links above to see their individual tutorials.
Preparing the Chicken Katsu
Set your cast iron skillet/wok on the stove and pour the vegetable oil in until the depth reaches approximately 3 cm (or 1.5 in). Bring the oil to 350 degrees Fahrenheit (180 degrees Celsius) on a medium heat. Make sure to keep an eye on your oil so it doesn’t burn!
While the oil is heating (which shouldn’t take long- 5-10 min.) we need to do is prepare our chicken.
1. Cut the meat into even slices. The ideal size is 2 cm (approx. 3/4 in.) in diameter.

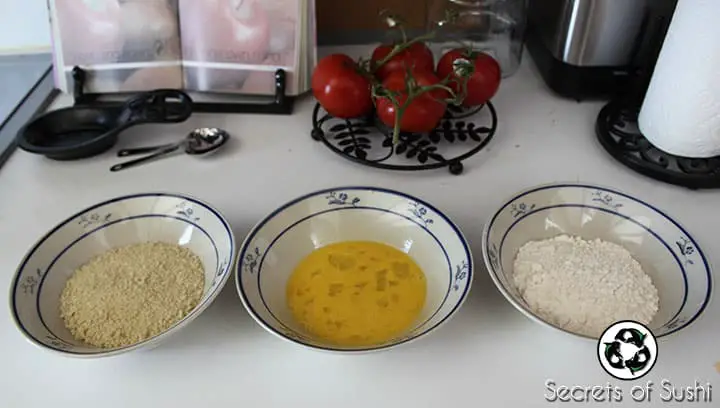
2. Next, set out three bowls, close to your oil, and pour flour into one, 1 whisked egg into another, and Panko into the last.
3. Test your oil to see if it has reached the proper temperature. You can do this by either using a cooking thermometer, dipping a chopstick into the oil, or by dropping a small piece of panko into the oil. Below, you can see that I’m using the chopstick method. We are looking for small bubbles to come off the chopstick to indicate that the oil is ready for frying.
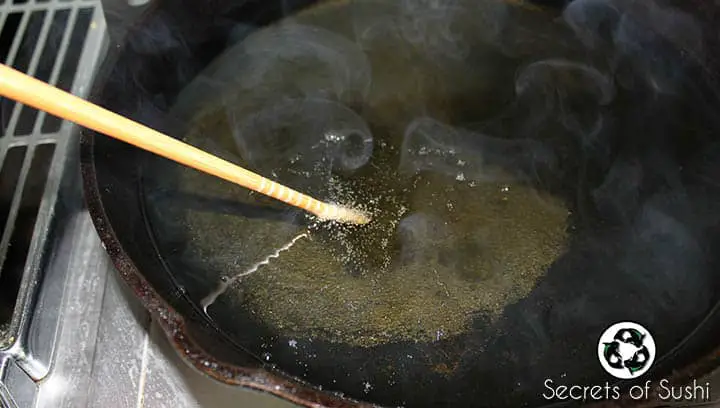
Notice how there is smoke coming from the oil? This means that the oil is about to burn. If this happens, remove the oil from the heat until it stops smoking. Also, using ventilation is recommended so you don’t set off your fire alarm!
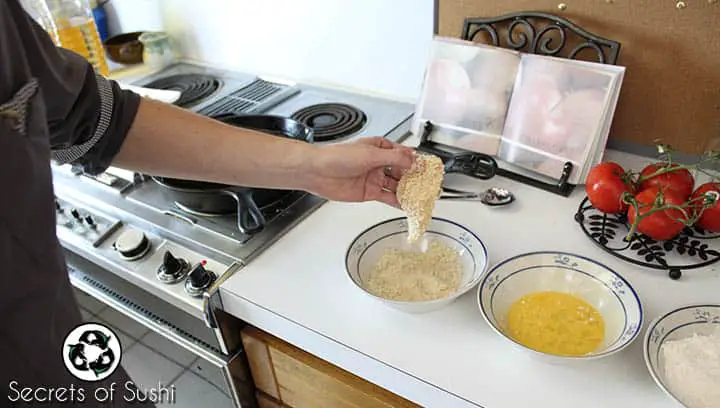
4. After verifying that your oil is ready, its time to start preparing your chicken for the fryer. Start by dipping one piece of chicken into the flour. Be sure to shake off any excess flour.

5. Next, dip it into the whisked egg. Try to cover the entire piece of chicken.

6. Then, quickly transfer your piece of chicken to the panko. Again, try to cover the entire piece!
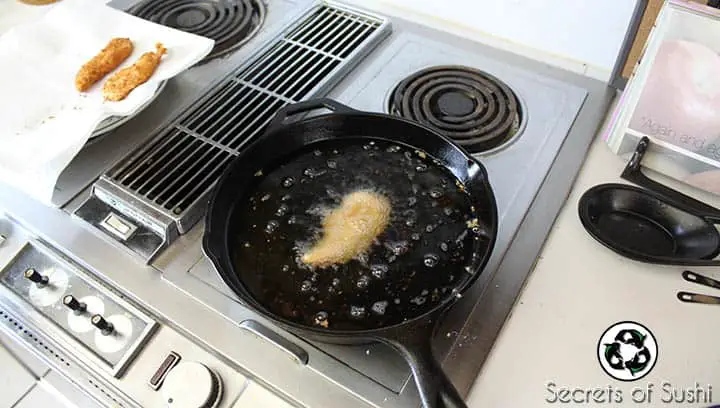
7. Carefully slide your breaded chicken into the oil. Be careful not to drop it! Hot oil splashing is never a good time…
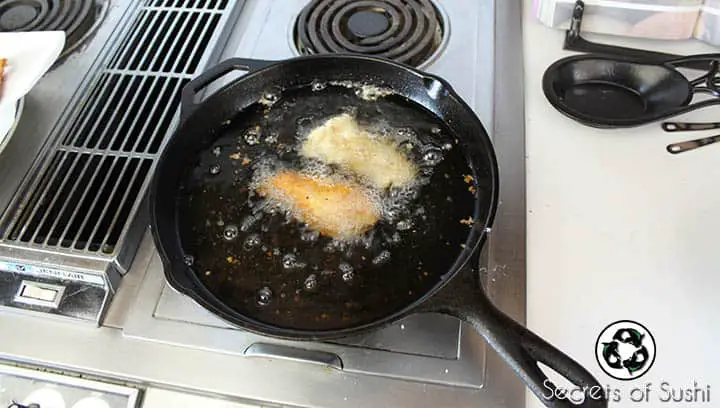
8. Using a pair of chopsticks or tongs, remove the chicken katsu from the oil after it turns a light, golden-brown color. Place the piece on a plate with paper towels. The paper towels will absorb any excess oil while the chicken continues to cook/turns darker in color.
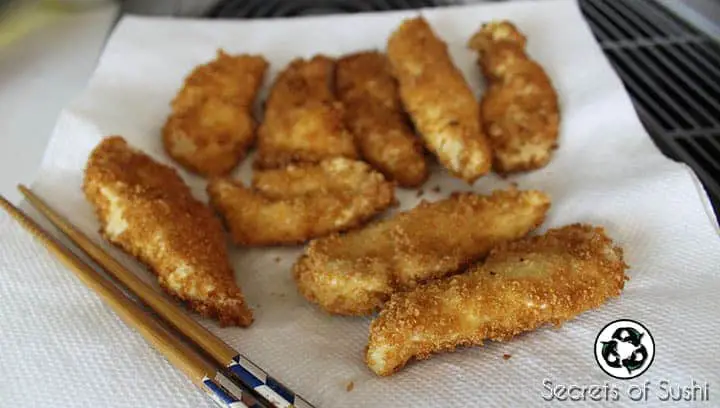
9. Repeat this process until you have fried all of your chicken. Be careful not to overfill your oil with the chicken pieces, as this will lower the temperature of your oil. I typically only fry 2-3 pieces at a time.
After all of the pieces have been fried, allow 3-5 minutes for the chicken katsu to cool down before you use them in a roll.
Preparing Tempura Crumbs
To make the tempura crumbs, you will want to mix:
- 1 cup (240 mL) of cold water
- 1 egg
- 1 cup (240 mL) of flour
Make sure that you have 2 bowls, some paper towels, and a fryer strainer ready before you get started.

This is actually the recipe I use for tempura batter. You can tempura fry anything from shrimp, vegetables, mushrooms to poultry! For tempura crumbs, however, we will just be frying the batter.
1. Whisk the egg into the water and remove any foam from the top.
2. Pour in the flour and mix together with a fork until all of the clumps have dissolved.
3. While the oil is still hot, use the fork to drip the batter into the oil.
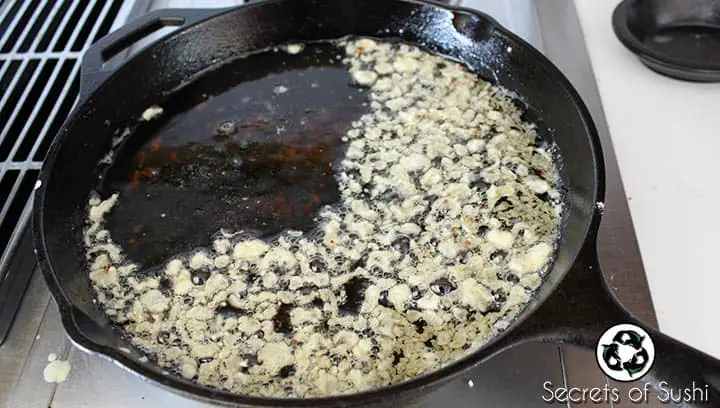
If you use cold water and only drip a little bit of batter in at a time, the batter will float to the top and create these types of “crumbs.”
4. Using a fryer strainer, scoops out the crumbs once they have turned a golden-brown color. Place them into a bowl with paper towels to allow any excess oil to drain. Its important that these little guys are nice and crispy.
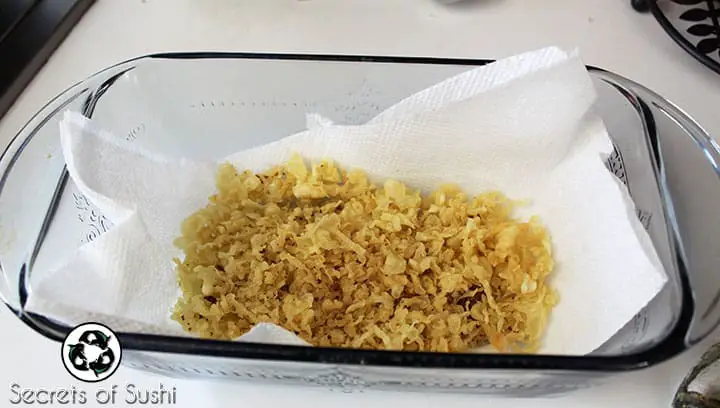
5. Finally, use your hands to crush the tempura crumbs into tiny pieces. Personally, I think the smaller the pieces, the better it looks on a chicken katsu roll.
Rolling a Chicken Katsu Roll
After the chicken has been fried, the tempura crumbs prepared, and your rolling station setup, we are almost ready to roll. The last bit of preparation involves simply cutting and rinsing off your Romaine lettuce.

Make sure that you have all of your ingredients ready! The tempura crumbs are not shown below, but they are on a countertop nearby.
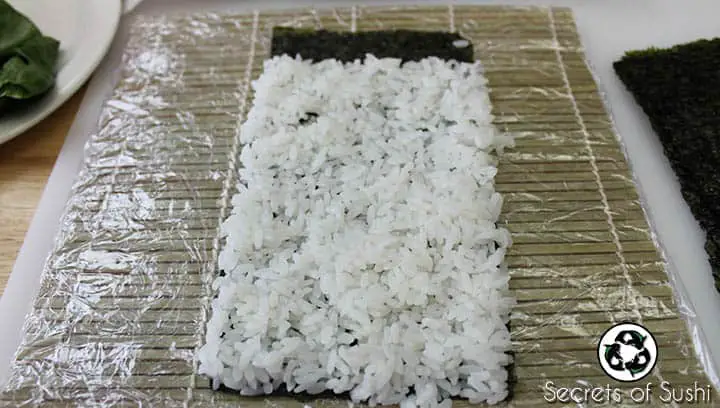
1. This roll is made as a half-futomaki, but with the rice on the outside instead of inside. To do this, apply the rice to the rough side of the nori – leaving approximately 1 in (2.5 cm) of the nori exposed on the top.
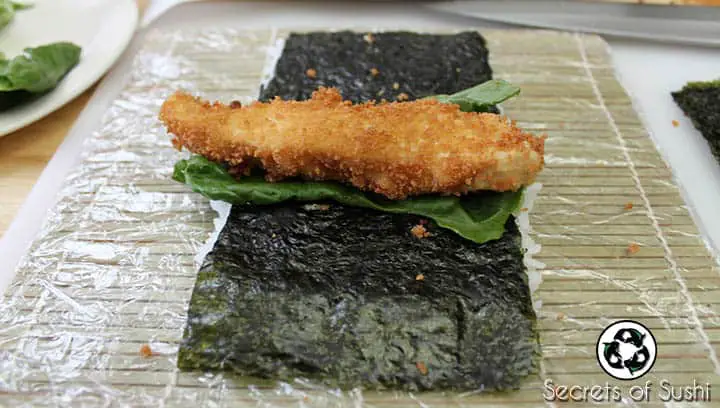
2. Flip the nori mat over, making sure that the exposed side of the nori is facing you, and place some lettuce and chicken katsu towards the center. Try to make the ingredients as consistent as possible.
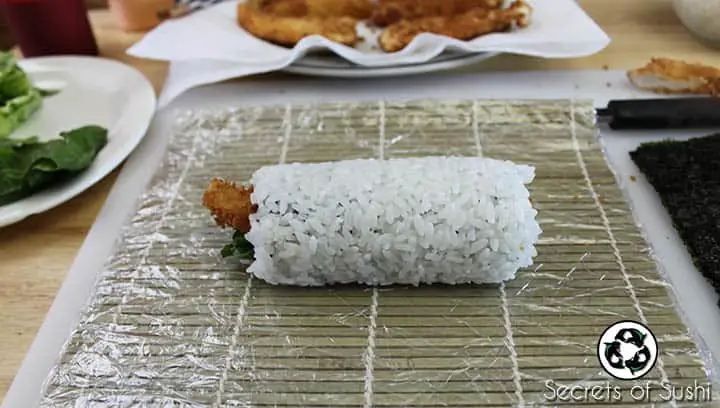
3. Using your thumbs under the makisu and your fingers to hold the ingredients in place, slowly roll from the bottom towards the top. As soon as the rice touched the smooth side of the nori, you can give the roll a gentle squeeze to make sure that the roll is tight.
4. Next, place the chicken katsu roll into the bed of tempura crumbs and roll it around. You want to get as much of the rice cover with tempura crumbs as possible.
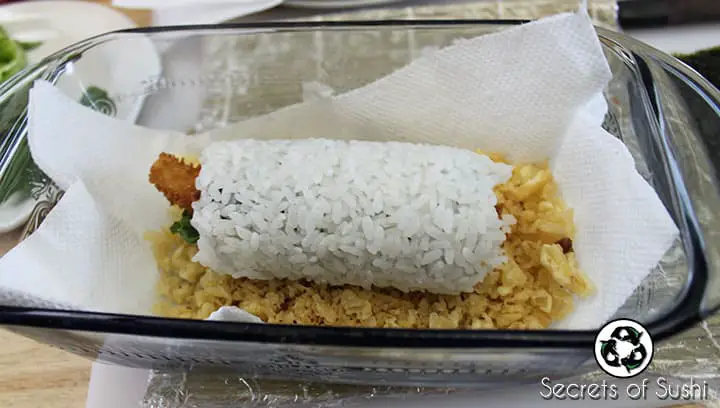

5. Use your makisu to press the crumbs into the rice. This will help prevent the crumbs from falling off while you cut the roll.
6. Cut your chicken katsu roll into 6 pieces and place it on a plate.
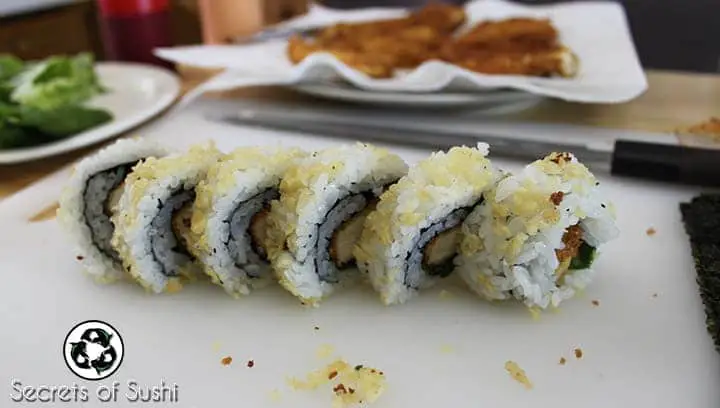
7. Lastly, drizzle some spicy mayo and eel sauce on top. Enjoy!


